Rotation flaps are an advanced wound closure technique that allows large wounds to be closed without distorting adjacent structures. This step-by-step video shows a rotation flap being created over a wound on the greater trochanter. It was created by Jon Hall MRCVS, RCVS Specialist in Small Animal Surgery.
When to use a transposition flap
Transposition flaps should be considered in small animal surgery when:
- Primary closure would result in excessive tension, risking dehiscence or distortion of adjacent anatomical structures
- There is insufficient skin for an advancement flap, but there is a reservoir of loose, mobile skin adjacent to (rather than in line with) the wound
- The wound would benefit from redistribution of tension away from the primary defect through movement of skin across an intervening area
- The recipient bed is clean and viable, with no necrotic tissue or contamination (traumatic wounds may require a period of open wound management before reconstruction is attempted)
How to perform a transposition flap
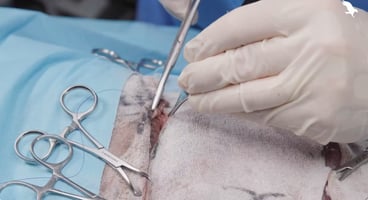
This video shows the process of creating a transposition flap in small animal surgery.

1. Prepare the patient
The patient should be placed under general anaesthesia and the surgical site widely clipped, aseptically prepared, and draped. As with advancement flaps and rotation flaps, inadequate preparation may restrict flap design or lead to contamination when the flap is repositioned, as non-sterile areas are pulled into the field when the skin is manipulated.
2. Prepare the donor site
Evaluate the size, shape, and location of the defect, along with the availability of nearby mobile skin. Transposition flaps are particularly useful when suitable donor skin lies adjacent to, but not directly in line with, the wound.
Using a sterile marker, outline a rectangular or slightly tapering flap next to the defect. The flap is designed to pivot into the wound, typically at an angle of 45–90 degrees. The width of the flap should closely match the width of the defect, while the length should be sufficient to allow the distal portion of the flap to comfortably reach the far edge of the wound without tension.
Ensure the base (pedicle) of the flap is broad enough to maintain an adequate blood supply. Avoid narrow bases, as these increase the risk of vascular compromise.
Incise along the marked lines and elevate the flap by undermining at the level deep to the panniculus muscle, or just superficial to the fascia where the panniculus is absent. Take care to preserve the subdermal plexus and avoid excessive thinning.
3. Placing and fixing the flap
Gently transpose the flap into the defect, using stay sutures to guide positioning and assess tension. The flap should reach the recipient site without force; if tension is present, further undermining or minor adjustments to the flap design may be needed.
Once the flap sits comfortably, begin suturing at the base of the flap and progress towards the distal tip. Closure should be performed in a tension-free manner, avoiding excessive suture placement that could impair blood flow.
The secondary defect created at the donor site is often amenable to primary closure, although additional undermining may be required to reduce tension.
Small standing cones (“dog ears”) may form at the margins of closure. These are commonly left in place, as they tend to flatten over time.
Top tips for transposition flaps
- Plan the pivot carefully. The angle of transposition (typically 45–90°) directly affects how far the flap will reach and how much tension is created. Ensure the flap is long enough from the pivot point to the distal edge of the defect before incising.
- Handle the flap atraumatically throughout. Use stay sutures to guide rotation into the defect and minimise direct handling of the skin edges, reducing the risk of vascular compromise.
- Preserve blood supply during elevation. The flap should be raised with its subcutaneous tissues intact to maintain the subdermal plexus—over-thinning significantly increases the risk of distal flap necrosis.
- Avoid thermal injury when creating the flap. Sharp dissection is preferred, as electrocautery can damage small vessels critical for flap survival.
- Manage both the primary and secondary defects thoughtfully. Consider whether a drain is needed, how best to bandage the area, and how to minimise tension at both sites.
- Plan aftercare in advance. Preventing self-trauma, providing effective analgesia, and ensuring appropriate postoperative monitoring are all key to flap success.
_BL_CourseThumb.jpg?width=500&height=300&name=IVE_GPCert(STS)_BL_CourseThumb.jpg)
Small Animal Soft Tissue Surgery
ISVPS General Practitioner Certificate (GPCert)
Postgraduate Certificate (PgC)
 April 2026
 Online | Swindon
Author